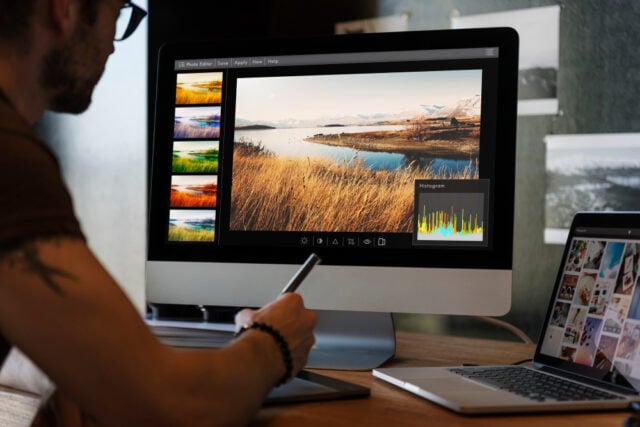
Lifestyle photography is about ordinary moments: a morning coffee, a walk through a city, a weekend trip, a new outfit, or time spent with friends. These images do not always need heavy editing. However, a thoughtful filter can help them look more consistent, attractive, and suitable for social media, blogs, or personal albums.
Creators who want a quick starting point can try a free ai filter online before making detailed adjustments. AI filters can suggest color treatments, lighting changes, and visual styles in a few seconds. The best results still come from choosing a filter that supports the original image instead of covering up its natural character.
What Makes a Lifestyle Photo Different?
Lifestyle photos are usually less controlled than studio images. They may be taken outdoors, inside a café, at home, or while traveling. Lighting can change quickly, and the subject may not be standing in a carefully arranged position.

This variety is part of the appeal. A lifestyle photo often feels personal because it includes small details such as a slightly messy table, sunlight through a window, or people moving in the background. Editing should improve the image while keeping this feeling.
A filter can help with:
- Color temperature
- Contrast
- Exposure
- Skin tone balance
- Background mood
- Sharpness and clarity
- Overall consistency across a photo set
The goal is not to make every image look identical. Instead, the goal is to create a visual connection between photos that belong to the same story.
Start With the Mood
Before selecting a filter, decide what the photo should communicate. A beach photograph may work well with bright, warm colors, while a rainy street scene may look better with cooler tones and softer contrast.
Common lifestyle moods include:
Bright and Energetic
This style uses lighter exposure, clear colors, and moderate contrast. It works well for outdoor activities, travel photos, fitness content, and daytime events.
Warm and Personal
Warm highlights and gentle shadows can make an image feel comfortable and familiar. This look is useful for family moments, food photography, home interiors, and café scenes.
Clean and Minimal
A clean filter usually reduces strong color shifts and keeps the image balanced. It can be helpful for fashion posts, product arrangements, workspace photos, and simple portraits.
Moody and Cinematic
Lower exposure, deeper shadows, and muted colors create a more dramatic feeling. This approach can suit evening walks, concerts, city streets, and storytelling posts.
Soft and Dreamy
Soft contrast and slightly faded colors can create a calm, gentle mood. It is often used for personal journals, travel memories, weddings, and quiet indoor scenes.
Choosing the mood first makes the editing process faster. Instead of trying every available effect, you can focus on filters that match the story.
Match the Filter to the Lighting
Lighting is one of the most important factors in lifestyle photography. A filter that looks good on a bright outdoor image may make an indoor photo appear too dark.
For photos taken in strong sunlight, avoid filters that increase contrast too aggressively. Bright areas may lose detail, especially on white clothing, walls, or clouds. A softer filter can keep the image clear while adding color.
For indoor images, a small increase in brightness may help. Warm filters can make a room feel inviting, but too much yellow can change skin tones and make white objects look orange.
Photos taken at night often need careful treatment. Strong sharpening may increase digital noise, while heavy saturation can create unnatural colors around lights. A subtle filter with controlled contrast is usually easier to refine.
When using AI filters, compare the result with the original. If the filter changes the lighting direction or makes the image look artificial, reduce its strength or select another option.
Protect Natural Skin Tones
Lifestyle content often includes people, so skin tone should be checked before publishing. AI filters may adjust the entire image at once, and some presets can add too much red, orange, or pink to faces.
A good filter keeps skin tones believable in different lighting conditions. Check the face in a larger preview instead of judging only from a small thumbnail. If the face looks too smooth, too pale, or overly saturated, reduce the effect.
Natural skin texture is also important. Some filters add automatic smoothing or remove small details. This may look acceptable in a quick social post, but excessive smoothing can make the person appear less realistic.
A useful approach is to apply the filter first, then make small corrections to:
- Brightness on the face
- Warmth and tint
- Highlight strength
- Skin texture
- Eye and hair detail
Small changes are usually enough. Lifestyle editing works best when people still look like themselves.
Create Consistency Across a Photo Set
Many creators publish several photos from one event. The images may have been taken from different angles or at different times, so their colors can look unrelated.
AI filters can provide a common starting point. For example, a travel album might use a warm filter for street scenes, food images, and portraits. A fashion series might use a clean, neutral look so that clothing colors remain accurate.
Consistency does not mean applying exactly the same strength to every photo. A photo taken in shade may need a stronger adjustment than one taken in direct sunlight. Use the same general style, then fine-tune each image separately.
A simple workflow is:
- Choose one image that represents the set.
- Test several filter styles.
- Select the filter that best matches the mood.
- Apply it to the other photos.
- Adjust brightness and contrast for each image.
- Review the photos together before exporting.
Looking at the full group helps you notice differences that are easy to miss when viewing one image at a time.
Use Filters for Different Lifestyle Categories
Different types of lifestyle content can benefit from different editing choices.
Travel Photos
Travel images often include bright skies, buildings, landscapes, and people. A balanced filter can improve color without changing the real appearance of the location. Avoid effects that make every sky extremely blue or every sunset intensely orange.
Food and Café Photos
Warm filters can make food appear inviting, but excessive warmth may reduce color accuracy. Greens, reds, and whites should remain recognizable. Soft contrast often works well for table scenes and indoor café images.
Fashion Photos
Fashion content requires attention to clothing color and texture. A filter should support the outfit rather than changing it. Neutral or slightly cool styles may help white, black, and pastel clothing appear more accurate.
Home and Interior Photos
Interior photos benefit from even exposure. A filter can brighten dark corners and create a consistent look across rooms. Be careful with color casts because they can make walls, furniture, or flooring appear different from reality.
Fitness and Outdoor Photos
Outdoor fitness images often use clear contrast and brighter colors. A moderate filter can add energy, but skin tones and shadows should remain natural. Avoid effects that make muscles or body outlines look exaggerated.
Personal Journals
Personal photo journals can use softer or more expressive filters. Because the goal is often emotional storytelling, a small amount of fade, grain, or warm color may be appropriate.
Combine Filters With Small Manual Adjustments
An AI filter is a starting point, not always the final edit. After applying one, check the image for basic problems.
Exposure controls how bright or dark the photo appears. Contrast controls the difference between light and dark areas. Saturation changes color intensity, while temperature shifts the image toward warm or cool tones.
A practical order is:
- Apply the filter at a moderate strength.
- Correct exposure.
- Adjust highlights and shadows.
- Check white balance.
- Reduce saturation if colors look too strong.
- Add a small amount of sharpness if needed.
- Review the image at full size.
Avoid changing every setting at once. One adjustment can affect how another setting appears. Working gradually makes it easier to understand what improved the image.
Avoid Over-Editing
Filters are easy to apply, which can make over-editing tempting. Common signs include:
- Skin that looks plastic
- Skies with unnatural colors
- Shadows with no detail
- Strong halos around objects
- Clothing colors that no longer match reality
- Excessive blur or sharpening
- Every photo looking like the same preset
If you are unsure, lower the filter intensity. Many lifestyle photos look better with a subtle effect than with a dramatic transformation.
A useful test is to look away from the screen for a few seconds and then compare the edited image with the original. Ask whether the photo feels clearer and more attractive, or simply more processed.
Think About Platform and Display
The same image may look different on a phone, laptop, or printed page. Social platforms may also compress images and adjust how colors appear.
For social media, make sure the main subject is visible on a small screen. A filter that creates a very dark background may hide important details. If the photo will be used in a blog or newsletter, check how it looks beside text and other images.
Export the image in a suitable format and keep the original file. Saving an unedited copy allows you to create a different version later without starting again.
Respect Privacy and Image Rights
AI filters can change faces, backgrounds, and recognizable details. Before editing or publishing an image that includes other people, consider whether you have permission to use it.
When working with photos from events, workplaces, or public spaces, avoid making changes that misrepresent what happened. Filters should improve presentation, not create a false impression.
If an image is being used for commercial work, confirm that the original photo, added music, graphics, and other assets can be used legally. Keeping a simple record of the source files and permissions can prevent problems later.
A Simple Filter Checklist
Before exporting a lifestyle photo, ask:
- Does the filter match the mood?
- Is the main subject easy to see?
- Do skin tones remain natural?
- Are important colors still accurate?
- Do highlights and shadows contain detail?
- Does the image fit with the rest of the photo set?
- Is the effect subtle enough for the intended audience?
- Have I saved the original file?
- Do I have permission to publish the image?
This checklist takes less than a minute and can improve the quality of a full content batch.
Final Thoughts
AI filters can make lifestyle photo editing faster and more consistent. They are useful for creators who need to prepare several images for social media, travel stories, fashion posts, newsletters, or personal albums.
The most effective workflow begins with a clear mood and ends with a manual review. Choose a filter that supports the lighting, protects natural skin tones, and keeps important details visible. Use AI for the first draft, then make small adjustments based on the actual image.
When the effect feels natural, viewers notice the story rather than the editing. That balance is what makes an AI filter valuable for everyday lifestyle photography.
Disclaimer
Artificial Intelligence Disclosure & Legal Disclaimer
AI Content Policy.
To provide our readers with timely and comprehensive coverage, South Florida Reporter uses artificial intelligence (AI) to assist in producing certain articles and visual content.
Articles: AI may be used to assist in research, structural drafting, or data analysis. All AI-assisted text is reviewed and edited by our team to ensure accuracy and adherence to our editorial standards.
Images: Any imagery generated or significantly altered by AI is clearly marked with a disclaimer or watermark to distinguish it from traditional photography or editorial illustrations.
General Disclaimer
The information contained in South Florida Reporter is for general information purposes only.
South Florida Reporter assumes no responsibility for errors or omissions in the contents of the Service. In no event shall South Florida Reporter be liable for any special, direct, indirect, consequential, or incidental damages or any damages whatsoever, whether in an action of contract, negligence or other tort, arising out of or in connection with the use of the Service or the contents of the Service.
The Company reserves the right to make additions, deletions, or modifications to the contents of the Service at any time without prior notice. The Company does not warrant that the Service is free of viruses or other harmful components.