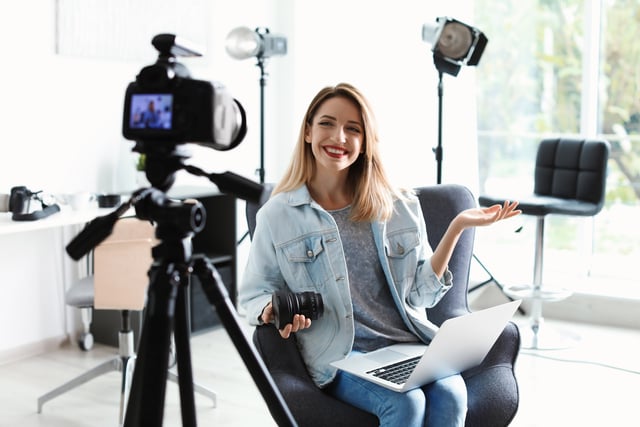
Vlogging can look expensive from the outside. Popular creators use cameras, lights, microphones, and polished editing, but beginners don’t need a full studio to start. A phone, a simple story idea, and a reliable editing workflow are enough to publish the first few videos.
The editing stage is where many new vloggers lose confidence. Raw clips often include pauses, background noise, shaky moments, and repeated explanations. A beginner-friendly editor can turn those clips into a clear story without requiring years of technical training. If you want to use a free video editor no watermark online, check whether it supports the basic steps needed to prepare a clean vlog.
Begin With a Simple Vlog Format
The first vlog does not need to document an entire day. A focused format is easier to film and edit. You might record a visit to a local market, a short study routine, a weekend project, or a behind-the-scenes look at a hobby.

A simple structure can include:
- A short opening that explains the plan
- Two or three main moments
- A personal observation or useful detail
- A closing thought
This structure helps you decide what to keep when editing. It also prevents the vlog from becoming a long collection of unrelated clips.
Before recording, write down one sentence that describes the video. For example, “I am testing three quiet study locations in my city.” This sentence can guide the opening, the shots you collect, and the final title.
Film With the Equipment You Have
A phone is enough for a first vlog. Clean the lens, hold the device steadily, and record a few seconds before and after each action. Those extra seconds give you room to make smooth cuts.
Use natural light when possible. Face a window rather than placing the window behind you. If the scene is dark, move closer to a light source instead of increasing the camera settings too much.
Audio often matters more than image quality. Speak close to the phone, avoid strong wind, and record important comments in a quieter place. If the environment is noisy, capture a few extra seconds of background sound so you can use it to smooth transitions later.
Organize Clips Before Editing
A simple folder structure can save time. Create one folder for the current vlog and separate clips into categories such as opening, main activity, detail shots, and ending.
You do not need to keep every recording. Remove accidental camera movements, repeated takes, and clips with unusable sound before importing them. A smaller collection makes the timeline easier to manage.
Give important files clear names if possible. “Market-wide-shot” and “market-food-stall” are easier to recognize than a list of automatic camera numbers.
Build the Rough Cut First
The first editing pass should focus on the story, not effects. Place the best clips in order and remove long pauses. Do not spend time choosing fonts or transitions until the main sequence makes sense.
Watch the rough cut from beginning to end. Ask whether the viewer can understand where you are, what you are doing, and why the moment matters. If a clip is attractive but adds no information or feeling, consider removing it.
A vlog usually feels more natural when clips have different lengths. A quick detail shot can last one or two seconds, while an important explanation may need more time. Avoid making every clip exactly the same length.
Create a Strong Opening
The first few seconds tell viewers whether the vlog is worth watching. Start with a clear statement, an interesting action, or a brief preview of what will happen.
You can introduce the plan directly: “Today I am comparing three cafés for remote work.” Another option is to show a quick sequence of highlights before returning to the beginning. The opening should create a reason to continue without exaggerating the result.
Keep the introduction short. A long logo animation or repeated greeting can delay the main idea. New vloggers often improve their videos simply by cutting the first ten seconds more tightly.
Use Text and Captions Carefully
Text can help viewers understand locations, times, prices, names, or short explanations. It is also helpful when someone watches without sound.
Use one or two fonts and keep the wording brief. A caption such as “8:30 a.m. — first stop” provides context without covering the entire frame. Place text where it does not block a face, product, or important action.
Automatic captions can save time, but review them manually. Names, places, and technical terms are often recognized incorrectly. Correct timing matters too. Captions that appear too early or remain too long can distract from the story.
Balance Music and Natural Sound
Music can make a vlog feel more energetic, but it should not hide the real environment. Keep the music low when someone is speaking. Let natural sounds remain audible during walking scenes, cooking, travel, or other activities where they add atmosphere.
Use brief fades at the beginning and end of a music track. Sudden starts and stops can feel unfinished. If the song is longer than the sequence, cut it at a natural beat instead of allowing it to continue over unrelated scenes.
Check whether the music is licensed for your intended platform. Free editing tools may include tracks with different usage conditions, so read the available information before publishing.
Fix Small Visual Problems
A beginner editor does not need to correct every frame, but a few adjustments can improve the result:
- Trim shaky starts and stops
- Reduce clips that are too dark
- Rotate footage recorded at the wrong angle
- Crop empty areas
- Match the color of clips recorded in different places
- Reduce distracting background objects
Use adjustments lightly. Heavy filters can make a vlog look inconsistent, especially when lighting changes from indoors to outdoors. A natural appearance is often easier to maintain across an entire video.
Choose the Right Format
Decide where the vlog will be published before exporting. A horizontal video works well for traditional YouTube viewing, while a vertical version may be better for short-form platforms.
If you want to share the same story in both formats, keep the main subject near the center while editing. You can then create a separate copy and adjust the crop for each platform.
Check text placement after changing the aspect ratio. A caption that looks fine in a horizontal frame may be cut off or cover a person in a vertical version.
Why a Watermark-Free Export Helps
A visible watermark can distract from a personal story and make a new channel look unfinished. It may also cover captions or important parts of a scene.
When choosing an editor, check the export process rather than assuming the preview reflects the final result. Some tools add a mark only after rendering, while others limit clean exports to particular templates or resolutions.
A watermark-free file is helpful for vlogs shared with friends, submitted for a class, included in a portfolio, or uploaded to a public channel. It gives the video a cleaner appearance and makes it easier to reuse the footage in future edits.
Keep the Workflow Fast
Vlogging becomes difficult when editing takes longer than filming every time. Create a repeatable process:
- Import only the useful clips.
- Arrange the story in order.
- Remove pauses and repeats.
- Add an opening and closing.
- Balance voice, music, and natural sound.
- Add short captions.
- Adjust brightness or cropping where needed.
- Review the complete video.
- Export a clean copy.
- Save the project and backup files.
You can also create a small style guide for your channel. Save a preferred caption style, intro length, music level, and color adjustment. This reduces repeated decisions and helps videos feel connected.
Review Before Publishing
Watch the final export on the device most viewers will use. Check the first thirty seconds, the audio, and every section where text appears.
Ask yourself:
- Is the main idea clear?
- Does the video move at a comfortable pace?
- Can viewers hear the important comments?
- Are captions accurate?
- Is any scene too dark or too shaky?
- Does the ending feel complete?
- Is the file free of unwanted marks?
A short pause for review can prevent many avoidable problems. If possible, ask one person who did not see the raw footage to watch the final version. Their questions can reveal where the story needs more context.
Common Vlogging Mistakes
New vloggers often record too much without a clear purpose. More footage does not always create a better story. Choose shots that support the main idea.
Another mistake is trying to copy a famous creator’s style immediately. Study how experienced vloggers use openings, pacing, and sound, but adapt those ideas to your own personality and resources.
It is also easy to over-edit. Constant zooms, transitions, and sound effects can make a simple day feel chaotic. Let some moments breathe. Viewers often enjoy a natural pause when it reflects the real experience.
Finally, do not wait for perfect equipment. Skills improve through publishing, reviewing, and making the next video slightly better.
A Practical First-Vlog Plan
For a first project, try this plan:
- Choose one small activity.
- Record an opening statement.
- Capture a wide shot, a few detail shots, and your reaction.
- Record one closing comment.
- Keep the final video between two and six minutes.
- Use one music track at low volume.
- Add only essential captions.
- Export and review the file before publishing.
This keeps the project manageable and gives you a complete result to learn from.
Final Thoughts
Starting a vlog for free is realistic when the workflow stays simple. A phone can capture the story, and a beginner-friendly editor can remove distractions, balance sound, add captions, and prepare the final format.
Look for an editor that is easy to understand, supports the platform you want to use, and offers a clean export without an unwanted watermark. Then focus on the parts that matter most: a clear idea, honest moments, understandable audio, and a comfortable pace.
The first vlog will not be perfect, and it does not need to be. A consistent process makes each new project easier. With practice, simple editing decisions can turn everyday footage into videos that viewers want to finish.
Disclaimer
Artificial Intelligence Disclosure & Legal Disclaimer
AI Content Policy.
To provide our readers with timely and comprehensive coverage, South Florida Reporter uses artificial intelligence (AI) to assist in producing certain articles and visual content.
Articles: AI may be used to assist in research, structural drafting, or data analysis. All AI-assisted text is reviewed and edited by our team to ensure accuracy and adherence to our editorial standards.
Images: Any imagery generated or significantly altered by AI is clearly marked with a disclaimer or watermark to distinguish it from traditional photography or editorial illustrations.
General Disclaimer
The information contained in South Florida Reporter is for general information purposes only.
South Florida Reporter assumes no responsibility for errors or omissions in the contents of the Service. In no event shall South Florida Reporter be liable for any special, direct, indirect, consequential, or incidental damages or any damages whatsoever, whether in an action of contract, negligence or other tort, arising out of or in connection with the use of the Service or the contents of the Service.
The Company reserves the right to make additions, deletions, or modifications to the contents of the Service at any time without prior notice. The Company does not warrant that the Service is free of viruses or other harmful components.